What is the production process of the MDF board? What steps are involved in creating MDF board furniture? How can we create MDF board furniture? Did you ever walk through these questions in your mind? These are pretty general questions with simple answers. It just needs a few steps with precision, but sometimes it can be overwhelming to grasp the cycle. By the end of this article, you’ll know exactly what needs to be done in the production process.
What is MDF?
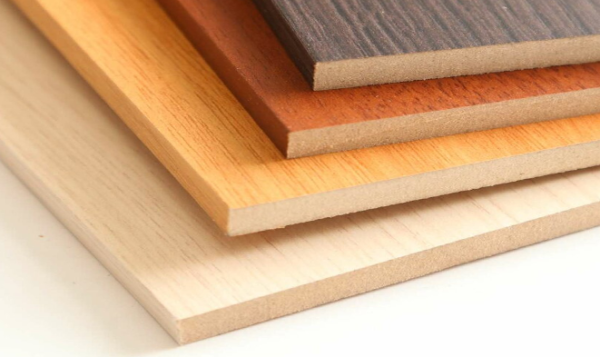
Medium-density fiberboard, also known as MDF, is a type of engineered wood made by breaking down hardwood or softwood into wood fibers and then binding them together with resin and heat.
What is MDF Board Furniture Manufacturing Process?
- Selecting Suitable Raw Materials To Prepare MDF Board
- The Wood Chips Preparation
- Mechanical Pulping Of Wood Chips To Fibers
- The Drying Process
- Boards Are Cut Into The Desired Shape
- The Clamping And Gluing Process
- Reinforcing Joints With Screws And Nails
- The Sanding Process
- Subsequent Processes
So, let’s get started, and trust me, in 3 minutes, you will know all the essentials of making MDF board furniture.
1. Selecting Suitable Raw Materials To Prepare MDF Board
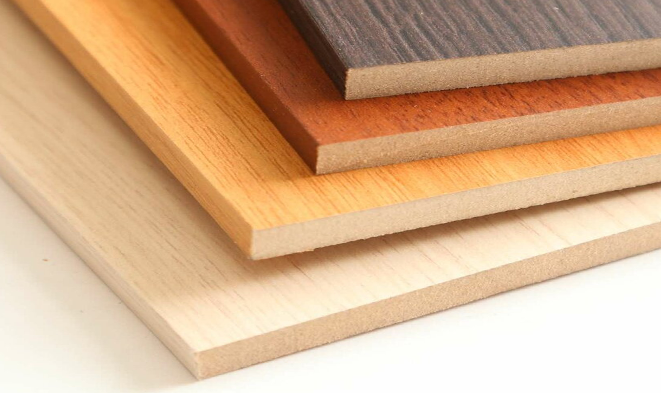
MDF is made by breaking down hardwoods and softwoods into wood fibers. On the market, there are four types of raw materials used to make MDF: oak, maple, pine, and fir. Next, I will give you a description of the characteristics of each of these woods.
1.1 Hardwoods
Hardwood trees grow slowly and produce dense wood that is generally darker in tone than softwood trees. Typical hardwoods found in high-quality wooden furniture are oak and maple.
1.1.1 Oak
Advantages of oak:
- Beautiful texture. The oak board has a very distinctive mountain-shaped wood texture, and with the use of hands to touch the surface of the oak board, the oak board has a perfect texture.
- The wood is hard. The Oak board texture is very hard, made of finished oak board structure is very strong, and oak board furniture has a long service life.
- High-grade material. The general grade is relatively high use of oak furniture, and oak board is very suitable for European-style furniture.
Disadvantages of oak:
- Less raw materials. Now more high-quality oak board species are relatively small; most of the oak boards on the market are from Russia and the United States. Some oak board material is from Turkey, Austria, Germany, and Canada. And some European America and some other regions have also produced oak boards, but the import volume is relatively small.
- Easy to crack. The stability of China’s oak board professional production manufacturers to produce oak furniture is very high. The texture of this oak board is very hard, but if you want to take off the moisture is more complex; no dehydration clean oak board furniture, after a year and a half, is very easy to deformation or shrinkage, cracking.
- The price is higher. The oak board is more expensive, and red oak and white oak slices are also ideal for the production of veneered plywood; the oak board pattern has a horizontal grain and a straight grain difference, which is more beautiful and slightly more expensive. Oak board is an excellent furniture material, but there are many on the market are rubberwood instead of the oak phenomenon is more common; if customers know a lot about oak board expertise is not, it will directly affect the interests of consumers.
1.1.2 Maple
Advantages of maple:
- Maple has interlocking texture, uniform structure, light and complex, excellent pattern, harmonious color, and no scar, which is a high-grade wood for decoration.
- Maple wood is strong, sturdy, durable, beautiful, and high-grade. Good paint performance, gluing.
- Maple is more robust in terms of nail grip, which will increase the service life of the furniture.
Disadvantages of maple:
- Dry shrinkage is relatively significant, easy to warp when dry, and will affect the aesthetic degree of furniture.
- The cut surface of maple wood is not smooth enough, and the maple furniture made of maple wood feels poor.
1.2 Softwood
Both Pine and fir are common softwood materials, and they are often used in conjunction with hardwoods.
1.2.1 Pine
Advantages of pine:
- Pine removes are aesthetically pleasing. Pine itself is natural in color and shade with natural grain.
- Pinewood is robust, durable, and practical.
- Pinewood is very elastic and breathable and has good thermal conductivity.
- Pinewood is soft and flexible, with low oil content, and its yin and yang color is evenly distributed.
Disadvantages of pine:
- Pine is softwood, easy to crack deformation, and high moisture content is also easy to cause pinewood cracking.
1.2.2 Fir
Advantages of fir:
- Firwood is light, easy to dry, slightly shrinkage, and not easy to warp and crack deformation.
- The natural aroma of fir wood can kill the bacteria in the air.
- The low oil content of fir wood makes it economical and practical.
Disadvantages of fir:
- Firwood but very fragile in a high-temperature environment, not only not resistant to touch but also easy to deformation.
- Firwood is not compact; the material is soft and easy to deformation and crack.
2. The Wood Chips Preparation

The wood chips used in the production process are usually prepared on-site. Preparing the wood chips on-site helps ensure that the wood chips used for MDF furniture are high quality and free of impurities. In addition, it helps to ensure that the wood chips are ready for use in the production process. Wood chip preparation can be divided into four steps.
2.1 Peel the logs
The log loader puts small-diameter wood, branch wood, and other wood materials on the storage platform and feeds them into the chipper through the belt conveyor. The chipper is equipped with a metal detector in front of the chipper to prevent wood with metal from entering the chipper. The wood entering the chipper is chipped into dimensional chips and sent to the chip storage bin via a screw conveyor and bucket elevator for storage. Since the soft and hardwoods are mixed in proportion, two storage bins are used to store the soft and hardwoods separately. The discharge device in the lower part of the storage bin can control the discharge speed. The discharge volume is governed by the discharge device according to the process ratio so that the soft and hardwood chips are mixed evenly according to the required balance. The percentage of soft and hardwood chips is 3:7 or 4:6, and the PH value of mixed wood chips should be relatively stable between 5.0 and 5.5.
2.2 Cut into small pieces
To speed up the uniform and even feeding of the raw material, it is necessary to convert the wood into smaller pieces to make it easier to produce fibers in the roasting section. This process results in no healthy and uncut fibers being built, and the rapid penetration of water vapor into the wood makes transportation easier. The most important part of this continuous operation is the particleboard’s length, width, and thickness. The most common type of wood crusher is the disc crusher equipped with a rotating vertical blade grinding wheel.
2.3 Sifting + removing impurities
The wood chips are sent to the vibrating screen for sieving by the belt conveyor, and the screening machine usually has two layers. After removing oversized and undersized wood chips and debris, the qualified wood chips are sent to the cleaning equipment to remove mud, small debris, dirt and metal pieces, etc. Wood chip cleaning can be divided into two ways: water washing and dry cleaning. According to the current situation of Chinese raw materials, water washing is more appropriate. However, wood chips water washing consumes a lot of water, and there is the problem of sewage treatment. The cost is high, although the quality of wood chips cleaning, high efficiency, conducive to fiber separation and the quality of the board, but the production of medium and small production scale plant of the thick board several wood chips dry cleaning method is still used. The cleaned wood chips are sent to the hot mill room by screw conveyor and bucket elevator.
2.4 Sorting and storage
The wood chips are removed from the slices by the magnetic drum and enter the pre-steaming bin before the hot mill for temporary storage. The adequate volume of the pre-steaming chest is 6M3 and is equipped with a material level indicator to observe the overfilling or vacancy of the wood chips.
3. Mechanical Pulping Of Wood Chips To Fibers

3.1 Pulping
Clean chips are softened in a steam-pressurized digester, then transported into a pressurized
refiner chamber. In the refiner chamber, single or double-revolving disks are used to mechanically pulp.
3.2 Drying
From the refiners, the fibers move to the drying and blending area. A rotary dryer may be
used for the initial drying of relatively wet furnish. Regardless of whether or not a dryer is used, tube dryers typically are used to reduce the moisture content of the fibers to desired levels. Single-stage or multiple-stage tube drying systems are commonly used in MDF manufacture.
3.3 Indirect heating
A primary tube dryer and a second-stage tube dryer are separated by an emission point, such as a cyclonic collector in multiple-stage tube dryers. Heat is usually provided to tube dryers by the direct firing of propane, natural gas, or distillate oil or by indirect heating.
This breaks down the cellulose in the wood chips into individual fibers, leaving behind a mat of fibers.
4. The Drying Process
The pads in the production process of MDF board furniture are dried by high-temperature hot air circulation drying.
The wet pads are first formed into semi-finished products in the production process. Then the semi-finished products are placed in the high-temperature drying room, and the hot air circulates evenly in the drying room to quickly remove the moisture from the wood. Finally, after the wood is dried to a certain dryness, it is removed and cooled to form the finished product.
This type of drying saves time and prevents warping and deformation of the wood caused by uneven drying.
5. Boards Are Cut Into The Desired Shape
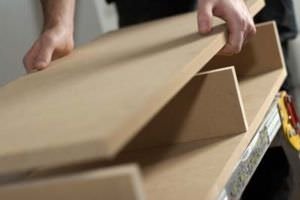
After the wood fibers have been combined and the MDF board pressed, it needs to be cut into the desired shape. Usually, people use three kinds of tools to cut MDF boards.
5.1 Using a table saw
First, use the table saw with a laminated blade and set the edge approximately 12-13 mm higher than the thickness of the MDF board you are cutting.
Make sure the table saw’s surface is immaculate before attempting any cuts, as any debris can cause a poor amount if the board moves or is not aligned.
Many dust particles will undoubtedly be generated when you cut MDF boards with a table saw. Therefore, always wear a suitable mask over your mouth and protect your eyes from dust before you start cutting.
When ready to cut, turn on the table saw, feed the MDF slowly into the blade in a fluid motion, and continue until the entire board is cut.
This should provide you with a clean edge and the best possible finish.
5.2 Using a jigsaw or circular saw
Both saws can be used to cut MDF; however, if laminated, the MDF surface must be scored before cutting.
First, place the MDF on a sturdy table or sawmill and clamp it in place to prevent movement.
Next, use a straightedge and chalk or pencil to mark the cutting line. Once you have drawn a bar, take a utility knife or Stanley knife and run the knife along the cut line steady to slow speed with minimal pressure. Do this until you have successfully cut through the laminated surface.
Finally, cut the MDF using a carbide blade with a TPI of at least 20, with the laminate surface facing up, and then proceed slowly and steadily until the entire sheet is entirely cut.
6. The Clamping And Gluing Process
In most cases, two-step bonding is preferred because it promotes maximum epoxy penetration into the bonding surface and prevents epoxy-deficient joints. Single-step bonding can be used when minimal joint loading and over-absorption of porous surfaces are not a problem. The best results are achieved when epoxy is bonded to the surface with a roller or brush.
Before mixing the epoxy, check that all parts to be bonded fit correctly and that the surface is prepared, collect all jigs and tools needed for the operation, and cover any areas that need to be protected from spillage.
Two-Step Epoxy Bonding
Wet-out epoxy bonding surfaces-Apply a neat epoxy resin/hardener mixture (without fillers) to the surfaces to be joined. Wet out small or tight areas with a disposable brush. Wet out larger rooms with a foam roller or spread the resin/hardener mixture evenly over the surface with a plastic spreader. You may proceed with step two immediately or any time before the wet-out epoxy coat reaches the final cure stage.
Apply thickened epoxy to one bonding surface. Modify the epoxy resin/hardener mixture by stirring in the appropriate filler until it becomes thick enough to bridge gaps between the mating surfaces and prevent “resin-starved” joints. Apply enough of the mixture to one of the surfaces so that a small amount of epoxy will squeeze out when the surfaces are joined together with force equivalent to a firm hand grip (Figure 10). Thickened epoxy can be applied immediately over the wet-out surface or any time before the wet-out reaches its final cure. For most small epoxy bonding operations, add the filler to the resin/hardener mixture remaining in the batch used for the wet-out. Mix enough epoxy resin/hardener for both steps. Add the filler quickly after the surface is wet out and allow for a shorter working life of the epoxy mixture.
Clamp components. Attach clamps as necessary to hold the pieces in place. Use enough clamping pressure to squeeze a small amount of the epoxy mixture from the joint, indicating that the epoxy is making good contact with both mating surfaces (Figure 11). Avoid too much clamping pressure, which can squeeze all epoxy mixtures out of the joint.
Remove or shape excess epoxy that squeezes out of the joint as soon as the joint is secured with clamps. A wooden mixing stick with one end sanded to a chisel edge is an ideal tool for removing the excess epoxy. (Excerpted from https://www.westsystem.com/instruction-2/epoxy-basics/bonding-clamping/)
7. Reinforcing Joints With Screws And Nails
This process helps to ensure that the finished product is sturdy and strong.
To reinforce a joint, screws and nails are first driven into the wood at an angle. This helps create a solid mechanical bond between the screw or nail and the wood. Once the screw or nail is in place, it is turned perpendicular to the wood’s surface. This creates a sheer force that helps to secure the joint further.
Finally, the adhesive is applied to the joint to provide additional strength. By following these steps, manufacturers can produce MDF board furniture that withstands years of use.
8. The Sanding Process
The sanding process is one of the final stages in the production of MDF board furniture. The furniture’s surface is sanded smooth to prepare it for painting or staining during this process.
In addition, the sanding process helps to remove any imperfections from the surface of the furniture, resulting in a smoother finish. The sanding process is typically completed by hand, using various grits of sandpaper.
A power sander can also be used for this process, but it is essential to be careful not to damage the furniture’s surface. Once the table has been sanded, it is ready for the final stage of production. The whole process can take several hours, but it is worth it for the final product.
9. Subsequent Processes
The current decorative processes for MDF panels are painted paper veneer, paint spraying, and powder coating.
9.1 Paint paper veneer
The decorative paper is one of the primary materials for surface decoration of artificial boards, accounting for more than 50% of the surface decoration of manufactured boards. Decorative paper types are more, according to the quantitative can be divided into thin page paper (quantitative 30g/㎡ ) and decorative paper; according to the use can be divided into Poly paper, gorgeous paper, pre-painted paper, low-pressure melamine impregnated paper, high-pressure melamine decorative paper, etc.
1. Roll-pressing method veneering process
Roll lamination is suitable for soft texture decorative paper, such as thin page paper and part of the pre-painted paper. Roll lamination is generally done continuously on a whole production line, divided into basic processes such as sanding off the substrate surface, surface dusting, gluing, pre-drying, laminating, and roll lamination.
2. Flat-pressing lamination process
Flat press lamination requires a decorative paper texture brace, thick and smooth, so mainly suitable for thick pre-painted paper, low-pressure melamine-impregnated paper and fireproof board, and other decorative paper. The pre-painted piece often uses low-temperature hot pressing, the impregnated paper uses high-temperature hot pressing, and the fire prevention board usually a cold-pressing method. The specific process of the flat pressing method can be divided into the fundamental techniques of paper preparation, substrate gluing, grouping, and pressurized gluing.
9.2 Paint spraying

After the sanding is complete, you have to start painting and prepare the paintbrush.
Use the brush to dip inside the paint bucket, do not stick too much at once. First, brush the furniture into an excellent place to wait to dry, paint dry, and then sandpaper for sanding, incredibly uneven spots to sand flat. After the first coat, put the furniture in a cool place and wait for it to dry. When the paint is dry, sand it with sandpaper, especially the uneven areas. Then the second coat of color, and then dry and sand. Then the third time, the steps are the same, and finally, wait until it is scorched before it is finished.
9.3 Powder coating

Powder coating construction process:
1. Edge coverage: Before spraying, add to the coating about 0.5-1.0% of the total formula, such as polyethylene wax, polyvinyl butyral, and other rheological agents, or add impediment to the flow agent such as silica to improve. So that the inside and outside surfaces of the coated workpiece edges can be evenly distributed like a flat position when spraying on the powder and curing into a film, without producing the phenomenon of shrinking and fat advantages. Otherwise, the phenomenon of roughness will often occur.
2. Bump particle concave point shrinkage: Usually, after being sprayed with powder coating, the object’s surface often has a bumpy particle phenomenon. Generally speaking, the raised particles are primarily because there are non-fusing organic materials in the raw material or the gelatinized microorganisms produced during extrusion. The concave downward shrinkage is mainly related to the type of resin or the external oil stain. Different microorganisms that are incompatible with each other or cannot be wetted are more likely to have small shrinkage holes, often less than 1 mm in diameter and in small numbers. The characteristics that distinguish them from pinholes are that pinholes are small and dotted in more significant numbers, and small shrinkage holes show a regular round shape. Resulting in the absence of large shrinkage holes, leveling agent failure, and external oil is the leading cause.
3. Pigment shading: more difficult when doing color, black and white red color highlighting leveling or color phase is difficult to do well.
Conclusion
I have outlined all the essential steps involved in the production process of MDF furniture. I hope this article has helped you gather all the information you needed to know about the production cycle of MDF board furniture.
FAQ
1. How To Paint MDF Board?
In a nutshell, painting an MDF board is a continuous process of sanding, wiping, lacquering, and drying. In this process, you need at least three coats of lacquer to achieve a good result.
If you want to do it yourself at home, then I recommend you to watch this video:
2. How To Waterproof MDF Board?
The only way to make MDF panels waterproof is to paint them. Paint the surface of MDF panels to make them moisture resistant only if you use moisture-resistant paint, as this type of paint will form a more permanent waterproof layer on the MDF.
3. How To Cut MDF Board Without Chipping?
To cut MDF without chips, you need to get a sharp carbide blade with more teeth, clean the table saw and install the blade, adjust it to match the size of the board, start the saw, then push the MDF board to mark the line until the cut is complete.
This article talks about three ways to cut, of which, using a circular saw to make a straight line cut is the best way not to produce chips.
If you are interested in the specific operation, I recommend you to watch this video:
